When you host your website on Google Cloud it is better to have a business email for your domain name. To set up email in Google Cloud, we can use Zoho free email service.
Steps for creating Business Email
- Creating Free Email Account on Zoho
- Verify your domain
- Configure MX records for Email Delivery
- SPF/DKIM setup
- Complete setup
Creating Free Email Account on Zoho
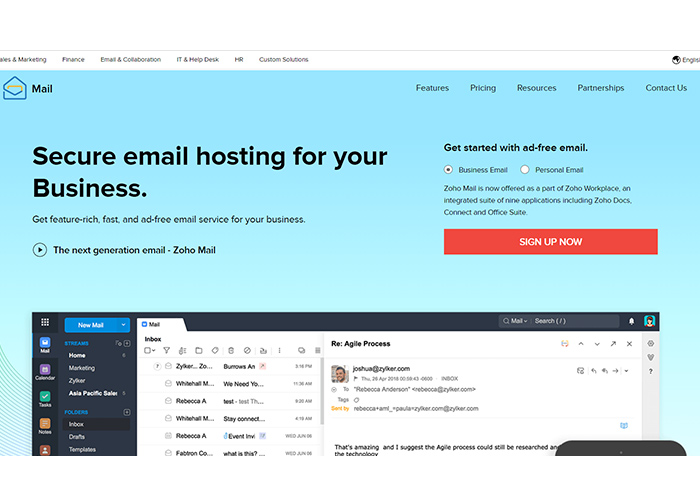
In the Zoho Email home page select Business Email and click Signup Now. You will be taken to the Pricing page, here scroll down a little and choose Free Plan.
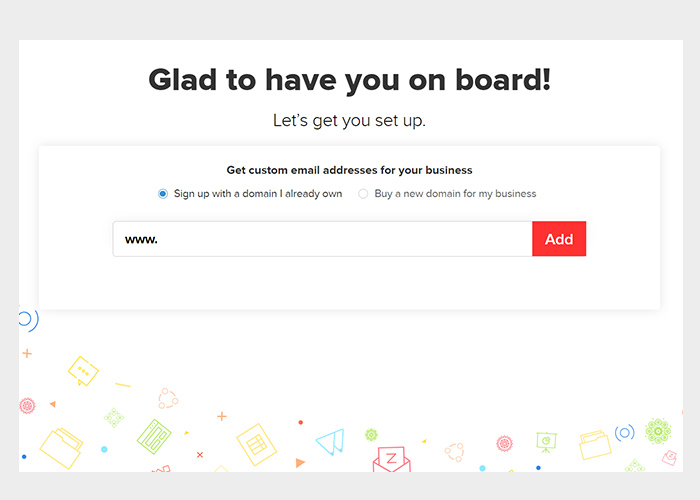
Now you will be on the setup page to add your domain name. Enter your domain name and click add.
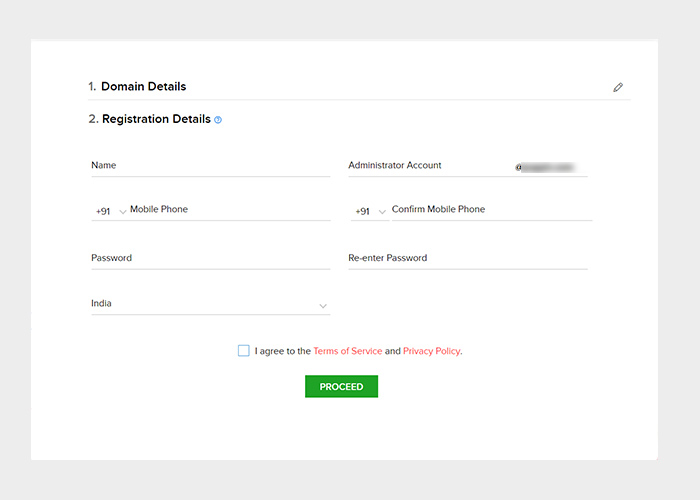
Next, fill your registration details and accept the terms of service and click proceed.
Now you will be on the welcome page and proceed to verify your domain.
Verify your domain
You can verify your domain ownership in 3 ways (CNAME method, TXT method, HTML method).
Now we will set up using the CNAME method.
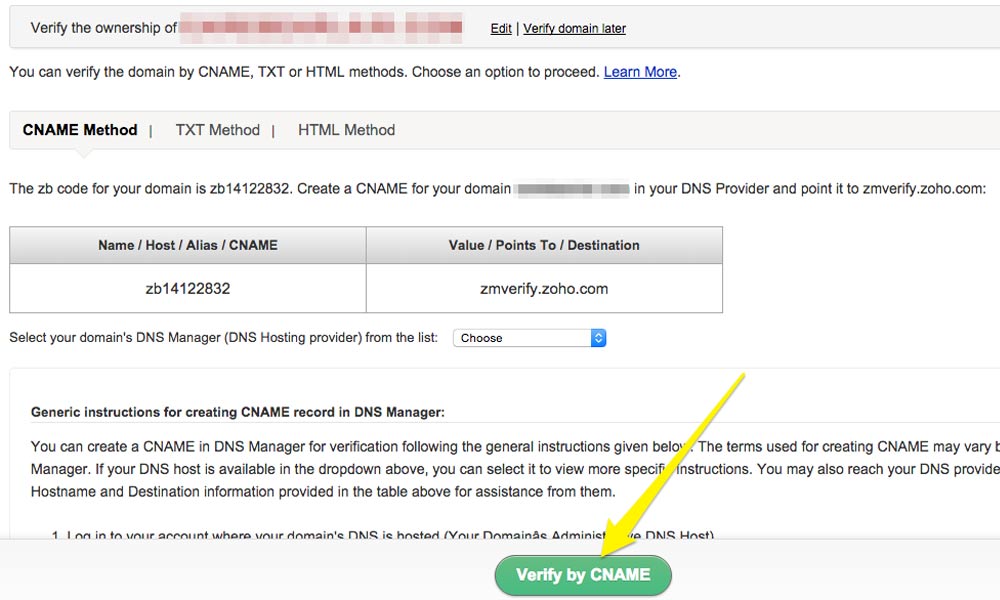
Go to your Domain’s DNS manager (Google Cloud DNS) for creating the CNAME record.
Go to your Google Cloud Account and navigate to Network services >> Cloud DNS and choose the domain name you need to verify.
Click Add recordset.
Enter the name provided by Zoho in the DNS name.
Select CNAME in the Resource record type.
Enter the value provided by Zoho in the Canonical name.
Click create.
Now in Zoho page click verify by CNAME.
It will take some time for the changes to propagate.
Once you are verified you can add users and create groups if you wish.
Configure MX records for Email Delivery
This is an important step for receiving emails.
Zoho will provide 3 MX records with hostname, address and priority to add them in the DNS Manager.
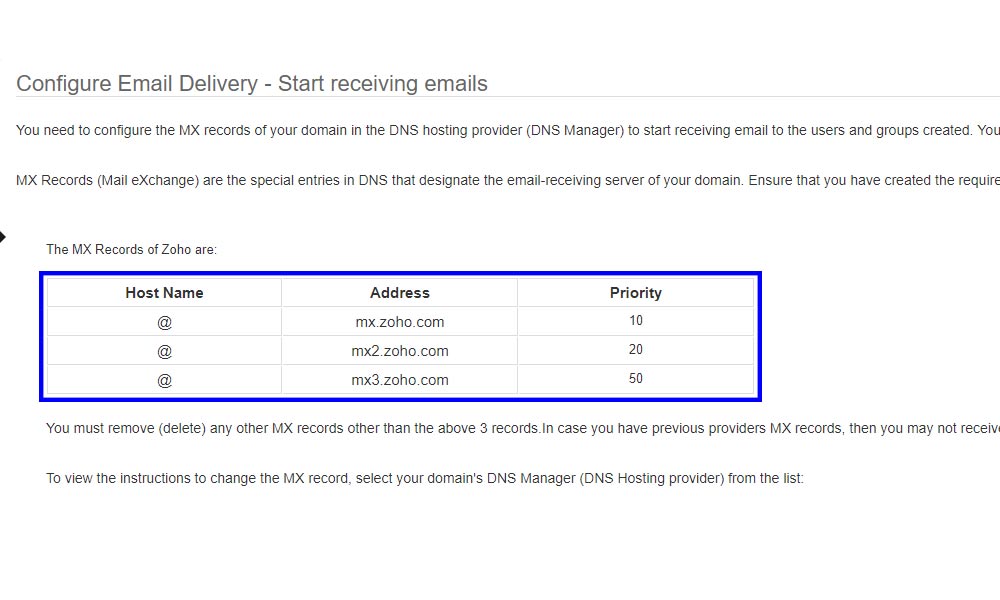
So again go to your Cloud DNS and click Add recordset.
Select MX in Resource Record Type.
Enter the below mentioned 3 records in the Preference and mail server. Use Add Item button to add additional items
10 mx.zoho.com
20 mx2.zoho.com
50 mx3.zoho.com
Click Create.
Back in the Zoho Configure Email delivery page click MX Lookup.
This will also take some time for propagation.
Click next.
SPF/DKIM setup
You can also skip this step and add this later.
SPF is the short name for Sender Policy Framework, is basically a TXT record associated with the domain name. Now add the SPF records in Cloud DNS.
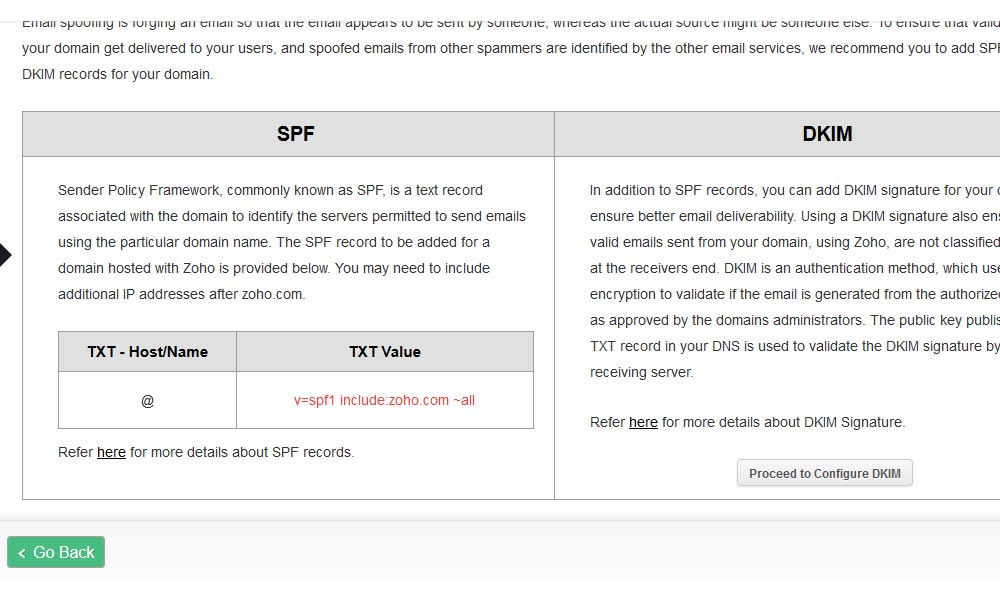
So again go to your Cloud DNS and click Add recordset.
Select TXT in Resource Record Type.
Enter the Text value provided by Zoho within quotes in the TXT data field.
Click Proceed to DKIM configuration.
Here your domain name will be listed, click the pencil icon to the right of your domain name to edit.
Now click Add Selector and provide a selector name and click save.
Then you will be provided with the TXT Name and TXT Value to add in your DNS manager.
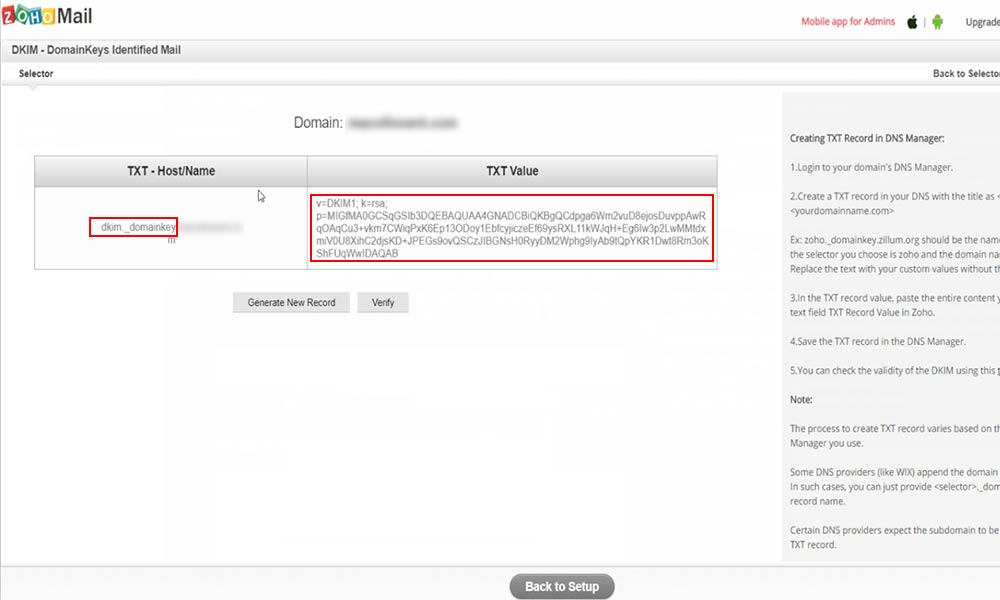
So again go to your Cloud DNS and click Add recordset.
Copy the TXT name without the domain name and paste it in the DNS name in your Cloud DNS.
Select TXT in Resource Record Type.
Copy the TXT value and paste it in the DNS name in the TXT Data field within quotes in your Cloud DNS.
Now you have configured your SPF and DKIM.
This will also take some time for propagation.
Complete setup
Click Back to setup and skip everything and click Goto workplace.
Now you will be in the Zoho Mail dashboard and you can use your business email for free.
To configure Zoho Mail in WordPress please check out how to set up SMTP for websites on Google Cloud
Leave a Reply
You must be logged in to post a comment.