Install Apache on Debian 9 – Google Cloud. Apache is the most widely used HTTP web server which provides dynamic loading modules, easily integrating with other applications.
Not using Debian 9? Choose a different OS:
This guide helps you to install Apache on Debian 9 on Google Compute Engine.
Prerequisites
- Your Compute Engine Instance running.
- For setting up Compute Engine, see the Setting up Compute Engine Instance with Debian 9.
- Debian 9 server setup on Google Cloud.
Install Apache
Let’s start by updating the local package index with the following command.
sudo apt update
Install Apache 2 package from the Ubuntu repository.
sudo apt install apache2
This will install apache2 and all required dependencies.
Setup Firewall
If your server is protected by Firewall (UFW) with Apache to allow public access on default web ports for HTTP and HTTPS
sudo ufw app list
You will see all listed applications.
Output
Available applications:
   AIM
   Bonjour
   CIFS
   DNS
   . . .
   WWW
   WWW Cache
   WWW Full
   WWW Secure
   . . .
- WWW: This profile opens only port 80 (normal, unencrypted web traffic)
- WWW Cache: This profile opens only port 8080 (sometimes used for caching and web proxies)
- WWW Full: This profile opens both port 80 (normal, unencrypted web traffic) and port 443 (TLS/SSL encrypted traffic)
- WWW Secure: This profile opens only port 443 (TLS/SSL encrypted traffic)
You need to enable the most restrictive profile that will still allow the traffic you’ve configured. Now we will enable WWW Full.
sudo ufw allow 'WWW Full'
With this command you can view the status of UFW.
sudo ufw status
You will see the output as follows.
Output
Status: active
 To                         Action      From
 --                         ------      ----
 WWW Full                   ALLOW       Anywhere
 OpenSSH                    ALLOW       Anywhere
 WWW Full (v6)              ALLOW       Anywhere (v6)
 OpenSSH (v6)               ALLOW       Anywhere (v6)
Check Apache Installation
Once Apache is installed is is started automatically and already be up and running.
Every process in Apache is managed with the systemctl command. Check the status of Apache with the following command.
sudo systemctl status apache2
Output
● apache2.service - The Apache HTTP Server
    Loaded: loaded (/lib/systemd/system/apache2.service; enabled; vendor preset: enabled)
    Active: active (running) since Thu 2019-02-14 05:17:04 UTC; 6min ago
  Main PID: 2080 (apache2)
     Tasks: 55 (limit: 4915)
    CGroup: /system.slice/apache2.service
            ├─2080 /usr/sbin/apache2 -k start
            ├─2082 /usr/sbin/apache2 -k start
            └─2083 /usr/sbin/apache2 -k start
 Feb 14 05:17:04 instance-1 systemd[1]: Starting The Apache HTTP Server…
 Feb 14 05:17:04 instance-1 systemd[1]: Started The Apache HTTP Server.
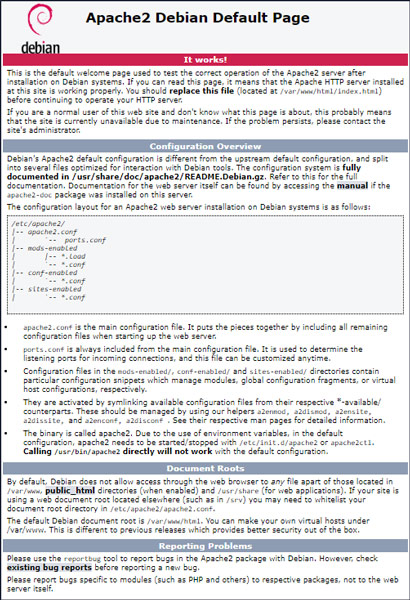
Now visit the External IP address of your VM instance, you will see the default Apache welcome page.

Apache Commands
To start Apache web server.
sudo systemctl start apache2
To stop Apache webserver.
sudo systemctl stop apache2
To restart Apache web server.
sudo systemctl restart apache2
To reload Apache without dropping connections.
sudo systemctl reload apache2
To disable Apache.
sudo systemctl disable apache2
To enable Apache.
sudo systemctl enable apache2
Now Apache is installed on Debian 9 – Google Cloud and configured with Firewall.
Leave a Reply
You must be logged in to post a comment.