How to Install Jenkins on Debian 10. Jenkins is a Java based software which is used to automated builds for tests, developments and production deployment from a version control repository like Github or Bitbucket, etc. It is mainly used as Continues Integration and Continuous Deployment (CI CD) software.
This guide provides all the steps needed to install Jenkins on a Debian 10 server.
This setup is tested on Google Cloud VM Instance with 3.75 GB RAM running Debian 10 Buster. So this installation will work on other cloud hostings, VPS or dedicated servers with Debain 10.
Setup Firewall Rules
If you are making this setup on Google Cloud you need to open certain ports on which Jenkins listens to.
Jenkins uses a custom port 8080 to run, so you need to create a firewall to all access to this port.
Go to VPC Network >> Firewall rules and click Create Firewall rules.
In Name enter jenkins
In Targets select All instances in the network
In Source filter select IP ranges
In Source IP ranges enter 0.0.0.0/0
In Protocols and ports check TCP and 8080
Click Create.
Install Java on Debian 10
Start by updating the packages to its latest version and install Java JDK 11 from the Debian repositories using the following command.
sudo apt update
sudo apt upgrade
Install Java.
sudo apt install default-jdk
Install Jenkins
To install latest version of Jenkins, add the repository key to the system and add the repository address to the sources list.
sudo wget -q -O - https://pkg.jenkins.io/debian/jenkins.io.key | sudo apt-key add -
sudo sh -c 'echo deb http://pkg.jenkins.io/debian-stable binary/ > /etc/apt/sources.list.d/jenkins.list'
Now you can update and install Jenkins.
sudo apt update
sudo apt install jenkins
Starting Jenkins
Once the installation is complete you can start Jenkins using the following command.
sudo systemctl enable --now jenkins
You can also view the status of Jenkins using this command.
sudo systemctl status jenkins
If Jenkins is started successfully you will get a response similar to this.
Output
● jenkins.service - LSB: Start Jenkins at boot time
    Loaded: loaded (/etc/init.d/jenkins; generated)
    Active: active (exited) since Thu 2019-12-19 09:15:55 UTC; 19s ago
      Docs: man:systemd-sysv-generator(8)
     Tasks: 0 (limit: 1997)
    CGroup: /system.slice/jenkins.service
Set Up Jenkins
Once everything is done you can open your browser and enter your IP address followed by the Jenkins port 8080
The format will be like this http://instance_external_ip:8080
You will see the Unlock screen where you need to type the password to unlock Jenkins.
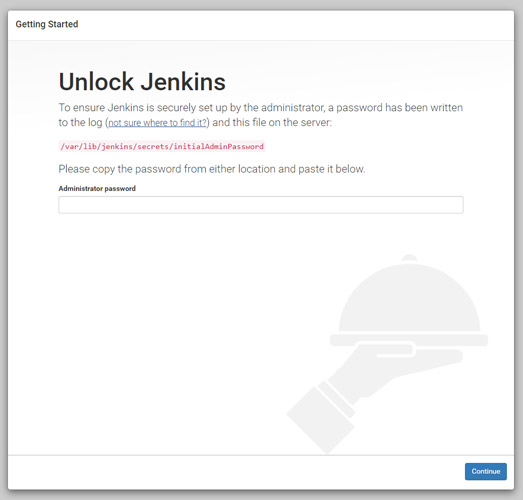
Execute the following command to get the password.
sudo cat /var/lib/jenkins/secrets/initialAdminPassword
Copy the password and paste it in the Administrator password field to unlock and start the setup.
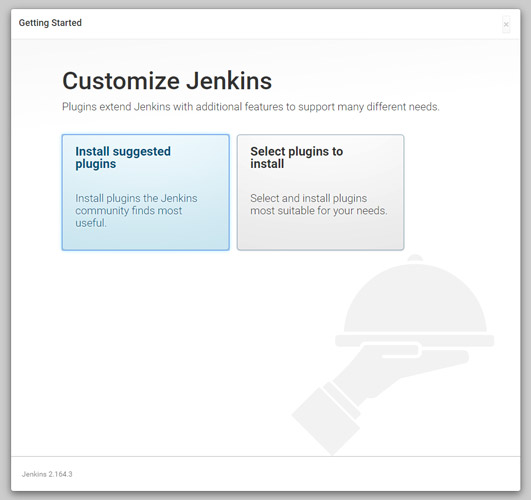
Click Install suggested plugins option to start the installation immediately.
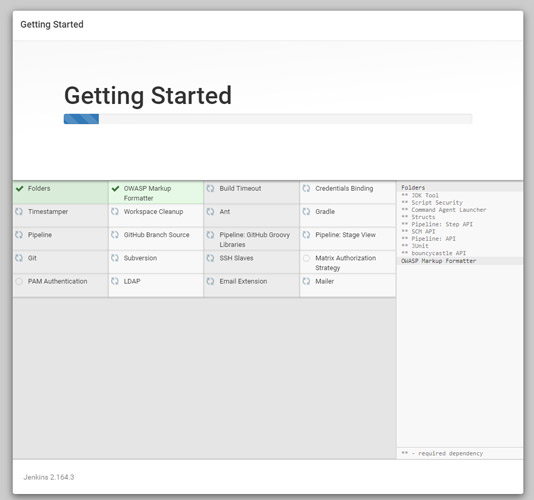
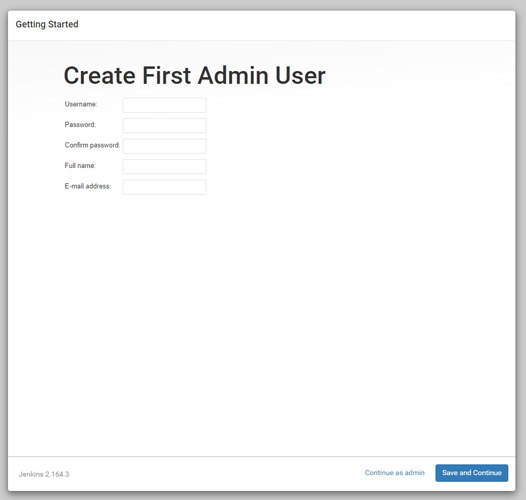
Once the installation is complete you can create an admin user to login to the dashboard.
Finally you will see the Instance Configuration, you can use your domain name or IP address.
Click Save and Finish.
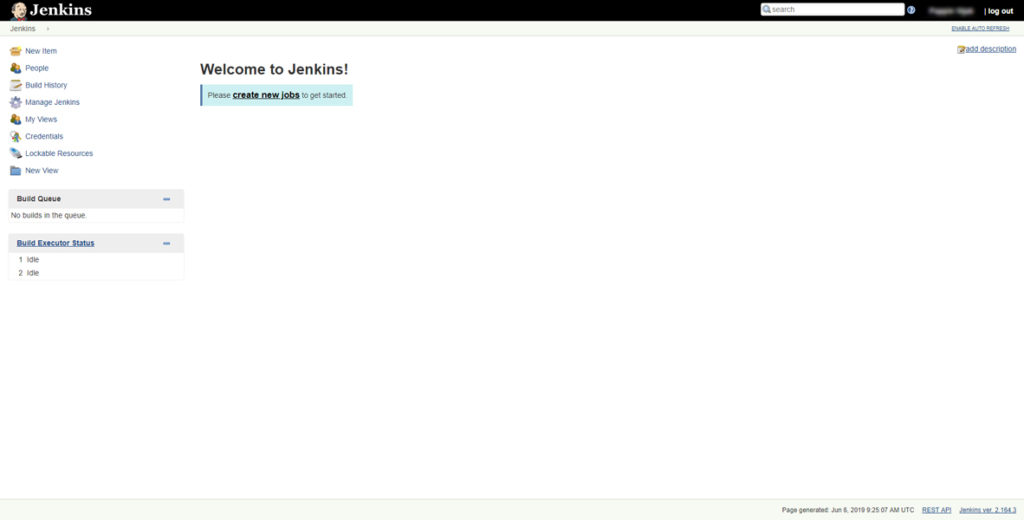
Once everything is complete click Start using Jenkins to visit the main Jenkins dashboard.
Gain a skill set to cultivate a Continuous Integration and Continuous Deployment capability now
Conclusion
In this tutorial, you have learned how to install Jenkins and configured Firewall on Debian 10.
If you have any questions, please leave a comment below.




Leave a Reply
You must be logged in to post a comment.