Create an EC2 Instance on AWS with Ubuntu 18.04. Learn how to create and setup your EC2 instance on Amazon Web Services with Ubuntu OS.
This guide shows you how to setup EC2 resources by choosing Amazon Machine Image (AMI), add storage, configure security groups, and create PEM key to access your instance using SSH.
Prerequisites
- An active Amazon Web Services account.
Steps to Create an EC2 Instance
- Choose Amazon Machine Image (AMI)
- Choose Instance type
- Configure Instance
- Add Storage
- Add Tags
- Configure Security Group
- Review Instance details
- Create PEM key and launch Instance
Step 1: Configure Amazon Machine Image
Let’s start creating an AWS EC2 Instance. Go to AWS console and navigate to Services >> EC2.
Click on Instances on the left sidebar.
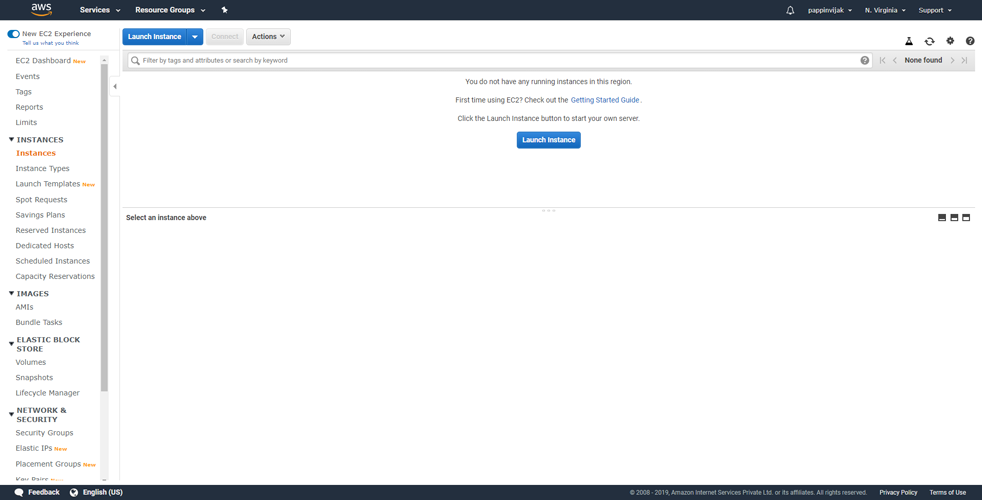
Click Launch instance.
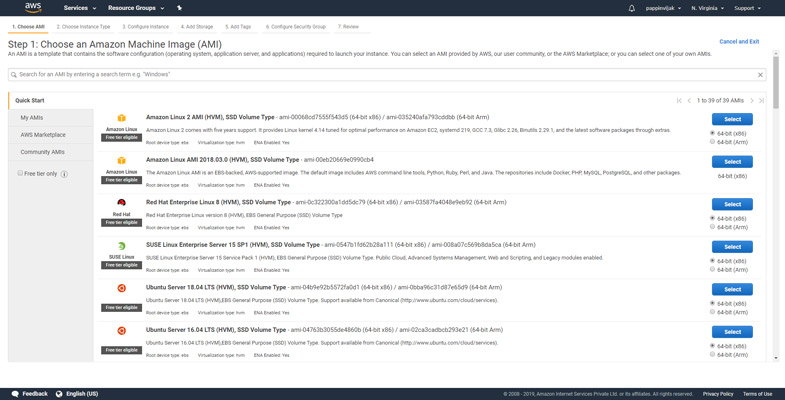
Now you can select the AMI here. Choose Ubuntu server 18.04 image here.
Step 2: Choose Instance type
Here you can choose your desired machine type. If you wish to get benefited using the free tier you can choose t2.micro type instance.
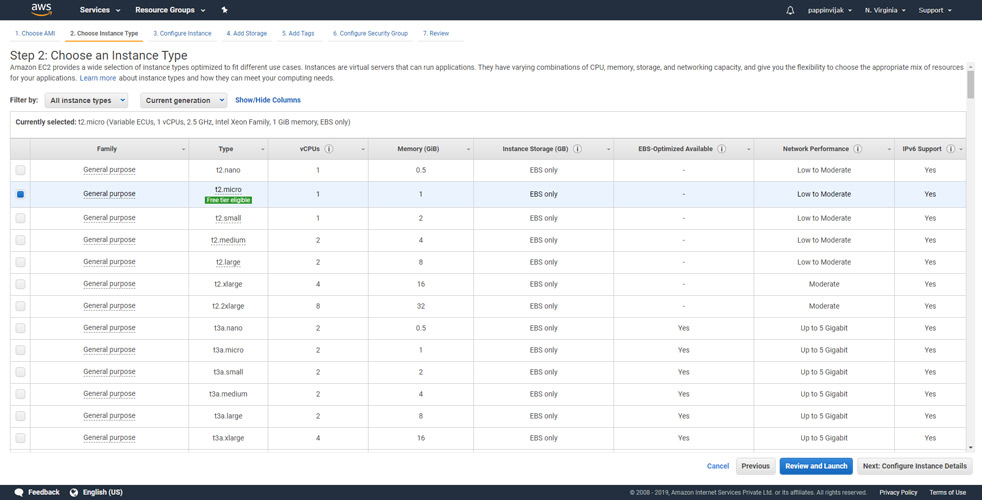
Click Configure Instance Details.
Step 3: Configure Instance
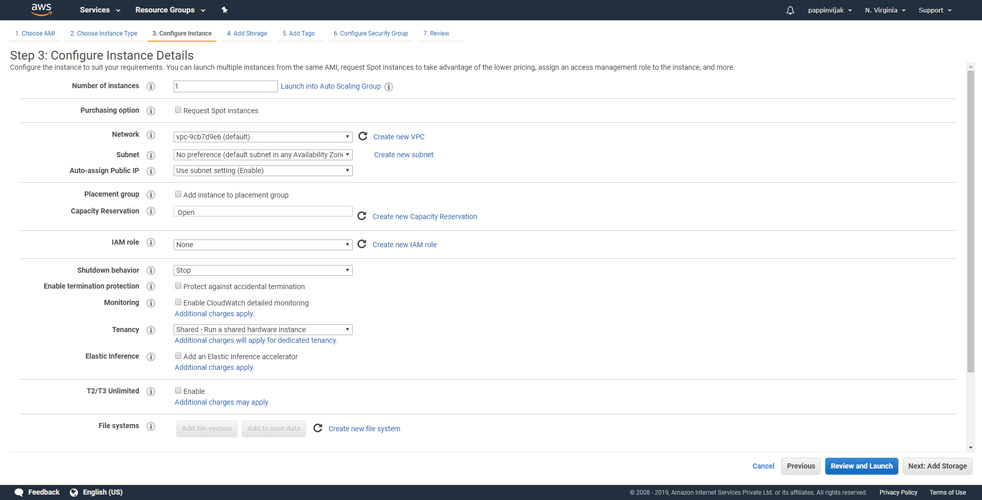
Here you can choose how your instance should run as dedicated or as shared. But for now you can leave all settings to be as default.
Click Add Storage.
Step 4: Add Storage
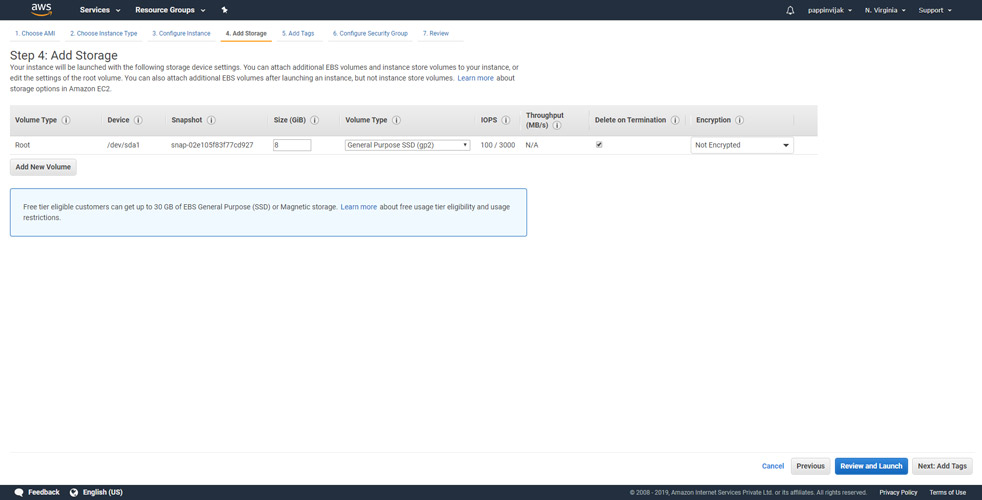
You can also leave this step to be with the default settings.
Click Add Tags.
Step 5: Add Tags
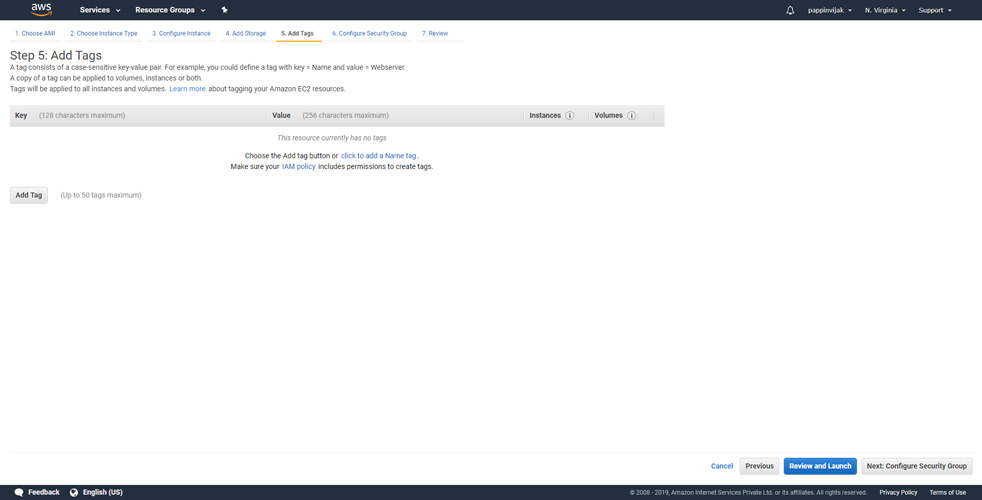
Tags are useful to identify the Instance, here we will assign a name to our instance.
Click click to add a name tag and enter a name in the value field.
Click Configure Security Group.
Step 6: Configure Security Group
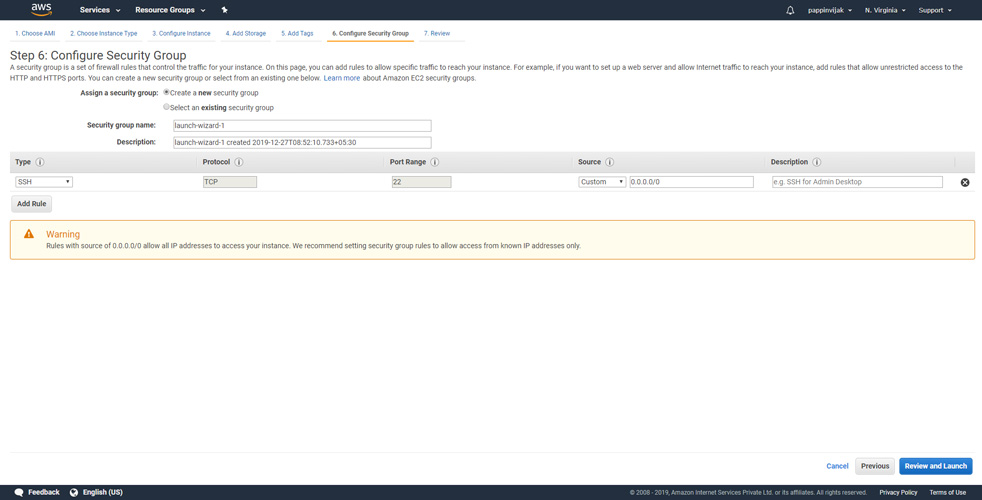
This is an important setup where you can allow connections to your instance by opening certain ports.
By default SSH port is enabled.
If you need your website to be viewed in the internet then you need add rules to allow connections to HTTP and HTTPS.
Click Add rule.
From the type select HTTP.
Again click Add rule.
From the type select HTTPS.
If you need any additional ports opened you can add rules for those ports also.
Click Review and Launch.
Step 7: Review the Instance details
In this section you can review all the options you have chosen in the steps before. Once you have reviewed them you can click launch.
Step 8: Create PEM key and launch Instance
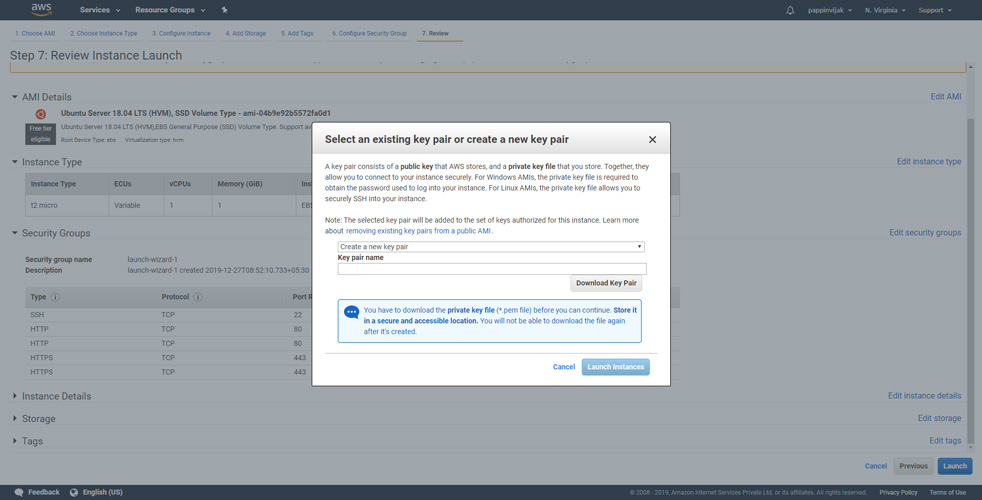
Now you will be prompted to assign a key pair to access your instance.
Select create a new key pair.
Enter a name to your key.
Click Download Key Pair.
Important: Save the key pair, if you miss this key you wont be able to access your instance using SSH.
Click Launch instances.
Become a Certified AWS Professional with this easy to learn course now.
That’s all. Now your instances will be launched with Ubuntu 18.04 and will all the configurations you made.




Leave a Reply
You must be logged in to post a comment.