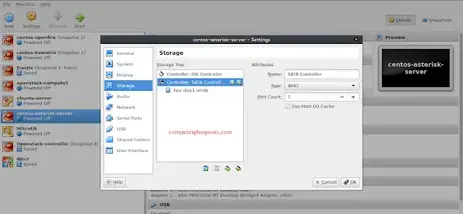
Learn how to – Add Extra Hard Disk to VirtualBox VM and set Automount.
This guide will demonstrate a simple way to add an extra virtual hard disk to Virtual Machine running on VirtualBox and create a mount point for it. We’ll also make the disk added auto-mount as the VM is booting up.
Follow the steps below to add an extrat hard disk to a VirtualBox VM.
Open VirtualBox GUI > VM > settings > Storage > Controller > SATA Controller

Click on Adds Hard disk icon > Create a new disk

Choose VDI ( You can choose any disk format you want to use)

Select Dynamically allocate ( You can use fixed as well)

Specify the name of the disk and size

Your disk should be added successfully under SATA controller, see below

Now that hard disk has been added successfully, let’s start VM and create a partition. Type lsblk command to confirm:

You can proceed to format and use it for your server operations. More guides on Virtualization:
- Top Courses To Learn VMware vSphere Administration
- Install BlackArch Linux on VirtualBox / VMWare using OVA
- Creating VM and Storage Logical Networks in oVirt/RHEV
Leave a Reply
You must be logged in to post a comment.