Install Webmin on Ubuntu 20.04. Webmin is a web based control panel to manage Linux your Linux server through a browser-based web interface. You can manage user accounts, cronjobs, DNS settings, and other common settings related to server using Webmin.
In this guide you are going to learn how to install Webmin on your server and secure it using Let’s Encrypt SSL.
Initial Server Setup
Start by updating the packages to the latest version available.
sudo apt update
sudo apt upgrade
Once the packages are updated you can start installing Webmin.
Install Webmin
To install Webmin you need to add the repository to the sources file so that you can install and update using the package manager.
Open the apt sources file.
sudo nano /etc/apt/sources.list
Add the following line to the bottom of the file.
deb http://download.webmin.com/download/repository sarge contrib
Hit CTRL + X followed by Y and ENTER to save and exit the file.
Now you need to add the GPG key to the system so that the added new repository will be trusted.
Import the GPG key using the following command.
wget -q -O- http://www.webmin.com/jcameron-key.asc | sudo apt-key add
Now you can update the packages index.
sudo apt update
Finally install Webmin.
sudo apt install webmin
Once the installation is complete you will receive the following output.
Webmin install complete. You can now login to https://server_name:10000/
as root with your root password, or as any user who can use sudo
to run commands as root.
Adjust Firewall
Now you need to adjust firewall configuration to allow connections on port 10000. If you are on Google cloud you need to create a firewall rule. If you are on AWS you need to add a rule in your security group.
If you have UFW configured in you server you need to allow Webmin through firewall using the following command.
sudo ufw allow 10000
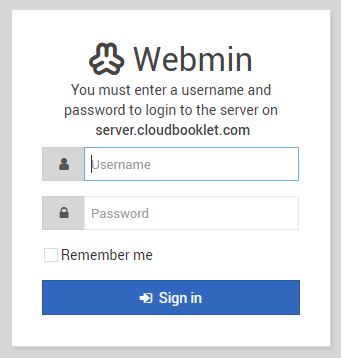
Now if you visit the domain name with the port you will see the login screen.
Install Let’s Encrypt Free SSL
By default Webmin is configured to use HTTPS with a self signed SSL certificate. You need to replace it using a valid Let’s Encrypt certificate to remove the privacy warning.
Make sure your domain name is pointed to your Webmin server.
Login to Webmin admin panel and replace the System hostname with your domain name.
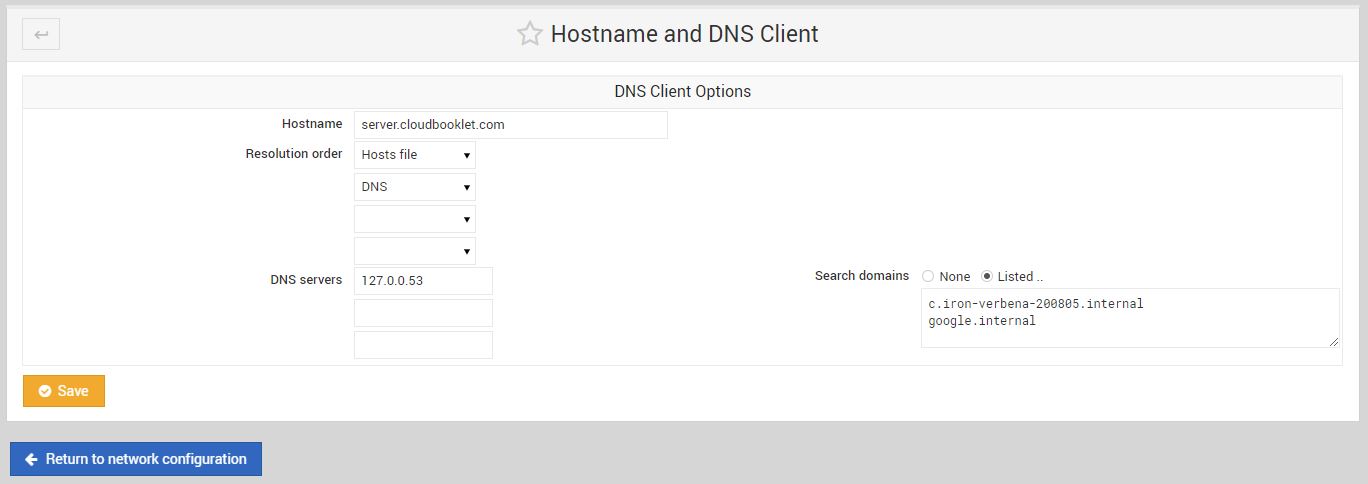
Click Save.
Navigate to Webmin >> Webmin Configuration.
In the Webmin Configuration page, select SSL Encryption and click on the Let’s Encrypt tab.
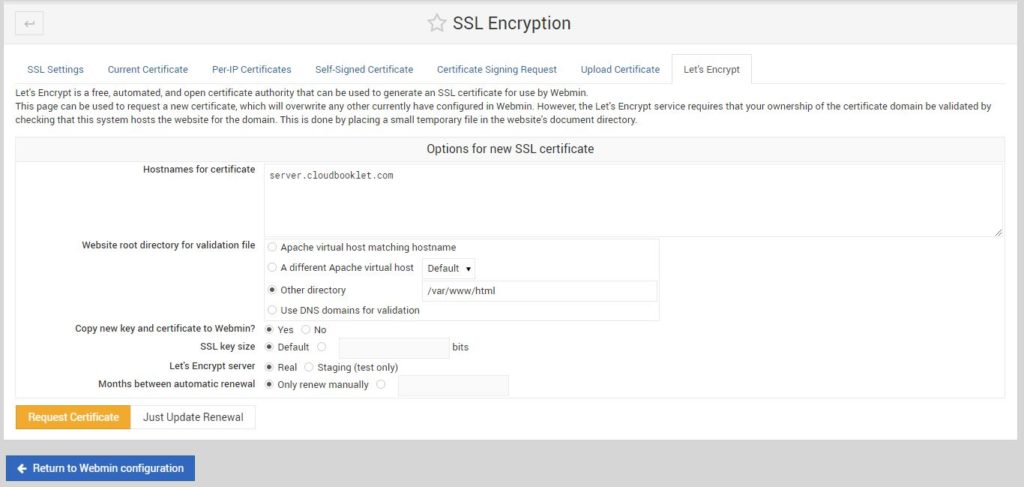
In Hostname for certificate your domain name.
For Website root directory select Other directory and enter the directory that you use to host your website (/var/www/html).
Click Request Certificate.
That’s all. You have a working setup with Webmin by which you can manage your server.
Conclusion
Now you have learned how to install Webmin and secure the installation using Let’s Encrypt SSL.
Thanks for your time. If you face any problem or any feedback, please leave a comment below.






Leave a Reply
You must be logged in to post a comment.