In this guide you are going to learn how to configure Google Cloud CDN for external websites which is not hosted on Google cloud and have a custom origin server.
Here we will configure a HTTPS load balancer and setup an external backend service with Network Endpoint Group (NEG) which connects to your server.
Prerequisites
Take note of the following.
- Your external server IP.
- Your domain name.
Create a Network Endpoint Group
Login to your Google Cloud console and navigate to Compute Engine >> Network Endpoint Groups.
Click Create network endpoint group.
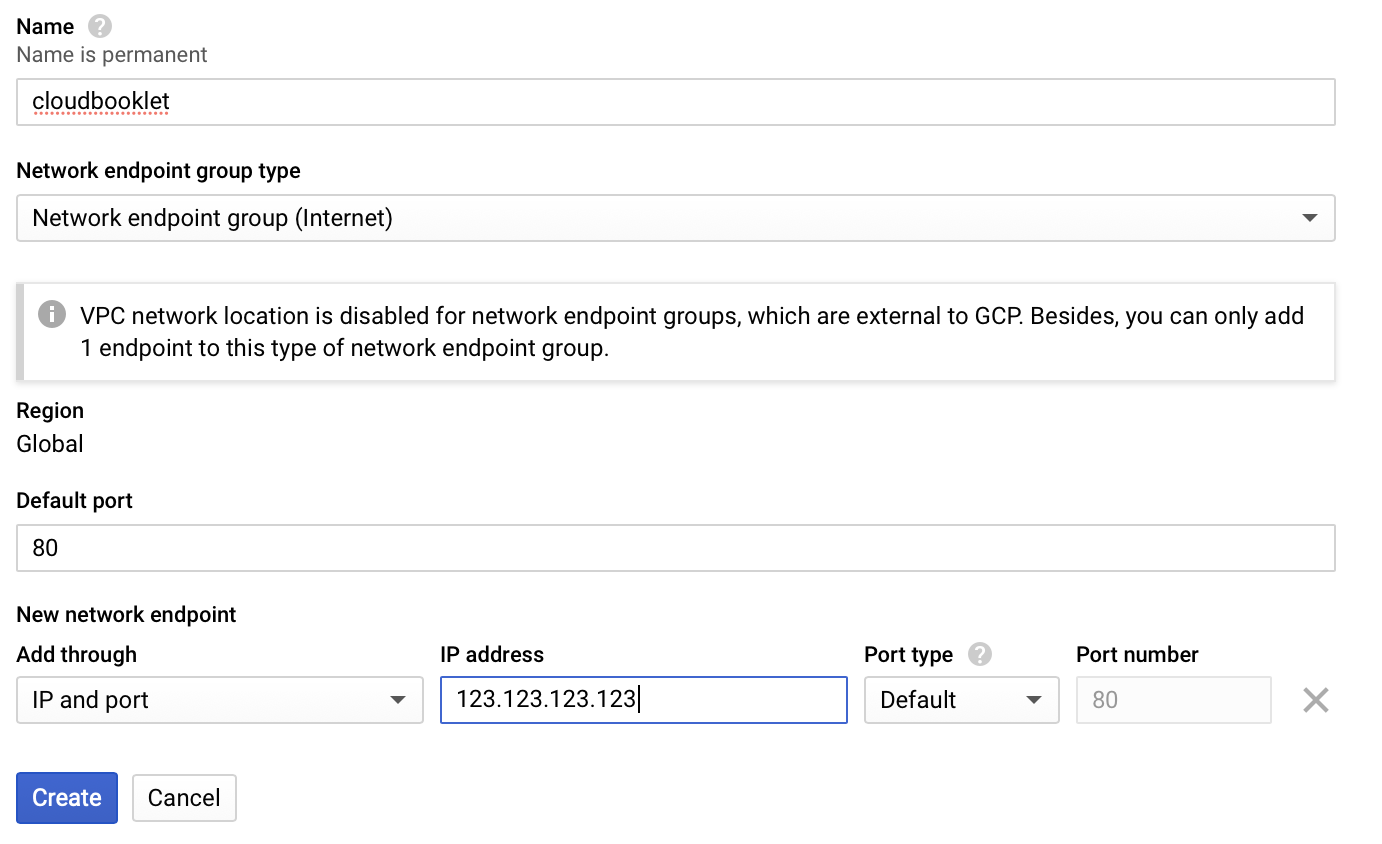
Enter name for your group.
In Network endpoint group type select Internet
In the Default port enter 80. If your website listens on some other port you can add that.
In New network endpoint select IP and Port in Add through and enter the IP of your external or custom origin server.
Click Create.

Create HTTP(S) Load balancer
Navigate to Networking >> Network Services >> Load Balancing.
Click Create Load balancer.
Click Start Cofiguration in HTTP(S) Load Balancing
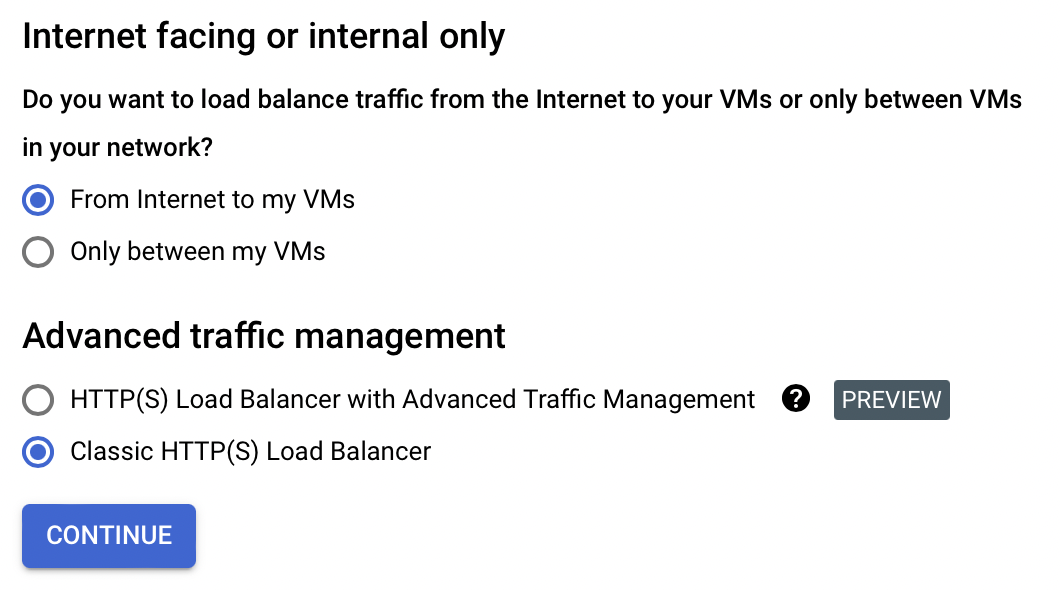
Choose load balancer type as From Internet to my VMs in Internet facing and choose Classic HTTP(S) Load Balancer.
Click Continue.

Enter name for your Load balancer.
Backend Configuration
In the Backend Configuration click Create a Backend Service.
Enter name for your backend.
In Backend type choose Internet network endpoint group
In the Backend, select the NEG you have created earlier.
Check Enable Cloud CDN.
Click Advanced Configurations.
In Custom request headers click Add header.
Enter Header name as Host and Header value as your domain name.
Click Create.
Frontend Configuration
In the Frontend Configuration create two forwarding rules for HTTP on port 80 and HTTPS on port 443.
In the New Frontend IP and port
Select Protocol as HTTP
In the IP address select Create IP address and add new IP address.
Click Done.
Click Add Frontend IP and Port to add a new HTTPS listener.
Select Protocol as HTTPS
In the IP address select the IP address you created before.
In the Certificate click Create new certificate.
Enter name for your certificate.
In Create mode choose Create Google-managed certificate.
In the Domains you can add your domain names.
Click Create.
You can choose HTTP to HTTPS redirect if needed.
Now finally you can click create to create the load balancer.
Point domain to Load balancer
Now go to your DNS manager and change the A record with the IP address you just created in Load Balancer to point your domain to load balancer.
Once the domain pointing is done the propagation might take 48 hrs to complete. Once the propagation is completed Google will install SSL.
Once SSL is installed the load balancer will act as CDN and route all your traffic.
That’s it.
Conclusion
Now you have learned how to configure Google Cloud CDN with HTTPS load balancer for external custom origin website..
Thanks for your time. If you face any problem or any feedback, please leave a comment below.
Leave a Reply
You must be logged in to post a comment.