Learn how to – Install Firecracker and Run microVMs on OpenNebula.
Firecracker is a free to use and open source virtualization technology for creating and managing secure, multi-tenant container and function-based services that provide serverless operational models. Firecracker runs workloads in lightweight virtual machines, called microVMs, which combine the security and isolation properties provided by hardware virtualization technology with the speed and flexibility of containers.
The microVM technology was developed by Amazon Web Services (AWS) to accelerate the speed and efficiency of Fargate and Lambda services. OpenNebula has managed to bridge the gap between two technological worlds, leaving behind the old dilemma between using containers–lighter but with weaker security–or Virtual Machine–with strong security but high overhead.
In this guide we explore how you can install and use Firecracker to run your microVMs on OpenNebula Nodes. This setup is performed on a Debian 10 Node but the same process can be done on any supported operating system.
Setup requirements
- Installed and Configured OpenNebula Front-end
- A physical host (x86-64 Intel or AMD processor) with virtualization capabilities
Step 1: Add OpenNebula Repositories
After OpenNebula front-end has been installed and configured, login to your the node where Firecracker will be setup.
$ ssh username@nodeipCentOS 8:
sudo rpm -ivh https://dl.fedoraproject.org/pub/epel/epel-release-latest-8.noarch.rpm
sudo tee /etc/yum.repos.d/opennebula.repo<<EOT
[opennebula]
name=OpenNebula Community Edition
baseurl=https://downloads.opennebula.io/repo/6.1/CentOS/8/x86_64
enabled=1
gpgkey=https://downloads.opennebula.io/repo/repo.key
gpgcheck=1
repo_gpgcheck=1
EOT
CentOS 7:
sudo rpm -ivh https://dl.fedoraproject.org/pub/epel/epel-release-latest-7.noarch.rpm
sudo tee /etc/yum.repos.d/opennebula.repo<<EOT
[opennebula]
name=OpenNebula Community Edition
baseurl=https://downloads.opennebula.io/repo/6.1/CentOS/7/x86_64
enabled=1
gpgkey=https://downloads.opennebula.io/repo/repo.key
gpgcheck=1
repo_gpgcheck=1
EOT
Debian/Ubuntu:
sudo apt update
sudo apt install wget gnupg2 -y
wget -q -O- https://downloads.opennebula.io/repo/repo.key | sudo apt-key add -
echo "deb https://downloads.opennebula.io/repo/6.1/Debian/10 stable opennebula" | sudo tee /etc/apt/sources.list.d/opennebula.list
sudo apt update
Step 2: Update the OpenNebula Firecracker Node
Upgrade the system before doing any installations:
Ubuntu | Debian:
sudo apt update
sudo apt -y full-upgrade
sudo reboot
CentOS:
sudo yum -y upgrade
sudo reboot
Step 3: Set Server hostname and Configure NTP
Login to the OpenNebula Firecracker Node and configure the hostname.
sudo hostnamectl set-hostname onefirecracker01.example.comWhere onefirecracker01.example.com is the actual LXD server hostname.
Consider adding the Server’s IP and hostname to /etc/hosts.
$ sudo vim /etc/hosts
192.168.100.13 onefirecracker01.example.com onefirecracker01 # Set correctly
Uninstall ntp package before installing chrony.
# Debian / Ubuntu
sudo apt remove ntp

# CentOS
sudo yum -y remove ntp
Install chrony ntp server pacakges:
# Ubuntu / Debian
sudo apt update
sudo apt install curl chrony -y

# CentOS
sudo yum -y install curl chrony
Set correct timezone on the server:
sudo timedatectl set-timezone Africa/Nairobi
sudo timedatectl set-ntp yes
Start and enable chrony ntp service:
# Debian / Ubuntu
sudo systemctl restart chrony
sudo systemctl enable chrony

# CentOS
sudo systemctl start chronyd
sudo systemctl enable chronyd
Initiate time synchronization using the following command:
$ sudo chronyc sources
210 Number of sources = 4
MS Name/IP address         Stratum Poll Reach LastRx Last sample
===============================================================================
^- time.cloudflare.com           3   6    35    13    -49ms[  -49ms] +/-  167ms
^- ntp1.icolo.io                 2   6    17    14   +655us[ +655us] +/-  109ms
^* ntp0.icolo.io                 2   6    17    16   +251us[ +116ms] +/-  109ms
^+ time.cloudflare.com           3   6    33    13    -49ms[  -49ms] +/-  167ms
Step 4: Install OpenNebula Firecracker Node Packages
Now that we’ve added the repositories we can install OpenNebula Firecracker Node Packages:
# Debian | Ubuntu
sudo apt update
sudo apt install opennebula-node-firecracker

# CentOS
sudo yum install opennebula-node-firecracker
Accept any prompts you get during installation:
The following additional packages will be installed:
  libarchive-tools libarchive13 libutempter0 lsof screen
Suggested packages:
  lrzip perl byobu | screenie | iselect
The following NEW packages will be installed:
  libarchive-tools libarchive13 libutempter0 lsof opennebula-node-firecracker screen
0 upgraded, 6 newly installed, 0 to remove and 24 not upgraded.
Need to get 1,340 kB of archives.
After this operation, 2,786 kB of additional disk space will be used.
Do you want to continue? [Y/n] y
Step 5: Configure Passwordless SSH on Front-end
The OpenNebula Front-end will connect to the hypervisor Nodes using SSH. You’ll need to configure Front-end and all Hypervisor Nodes to connect to each other over SSH without password authentication. This eliminates any manual intervention.
OpenNebula front-end node actions:
Login to your Front-end OpenNebula node:
$ ssh username@frontend_ipSwitch to oneadmin user:
$ sudo su - oneadmin
oneadmin@onefront:~$
When OpenNebula server package is installed on the Front-end, a SSH key pair is automatically generated for the oneadmin user into:
$ file /var/lib/one/.ssh/id_rsa
/var/lib/one/.ssh/id_rsa: OpenSSH private key

$ file /var/lib/one/.ssh/id_rsa.pub
/var/lib/one/.ssh/id_rsa.pub: OpenSSH RSA public key
Copy the contents of /var/lib/one/.ssh/id_rsa.pub file from frontend:
$ cat /var/lib/one/.ssh/id_rsa.pubOpenNebula LXD node actions:
Login to OpenNebula LXD node to be configured:
$ ssh username@onefirecracker01Switch to oneadmin user account with the commands below:
$ sudo su - oneadmin
oneadmin@onefirecracker01:~$
Create the authorized keys file if doesn’t exist:
touch /var/lib/one/.ssh/authorized_keysAdd the copied Frontend SSH public key to file:
vim /var/lib/one/.ssh/authorized_keysTest Passwordless SSH connectivity from Front-end
I recommend you add IP and hostname mapping in the Frontend /etc/hosts file:
$ sudo vim /etc/hosts
192.168.100.13 onefirecracker01.example.com onefirecracker01 # Set correctly
As oneadmin user initiate an SSH request:
$ sudo su - oneadmin
oneadmin@onefront:~$ ssh oneadmin@onefirecracker01
Confirm SSH connectivity without password authentication:
Warning: Permanently added 'onefirecracker01,192.168.100.12' (ECDSA) to the list of known hosts.
Linux onefirecracker01.example.com 4.19.0-14-amd64 #1 SMP Debian 4.19.171-2 (2021-01-30) x86_64

The programs included with the Debian GNU/Linux system are free software;
the exact distribution terms for each program are described in the
individual files in /usr/share/doc/*/copyright.

Debian GNU/Linux comes with ABSOLUTELY NO WARRANTY, to the extent
permitted by applicable law.
oneadmin@onefirecracker01:~$
Step 6: Add Firecracker Node to OpenNebula
Login to Sunstone web interface and navigate to Infrastructure -> Hosts

Click on the + button.

Choose “Firecracker” as your host type:

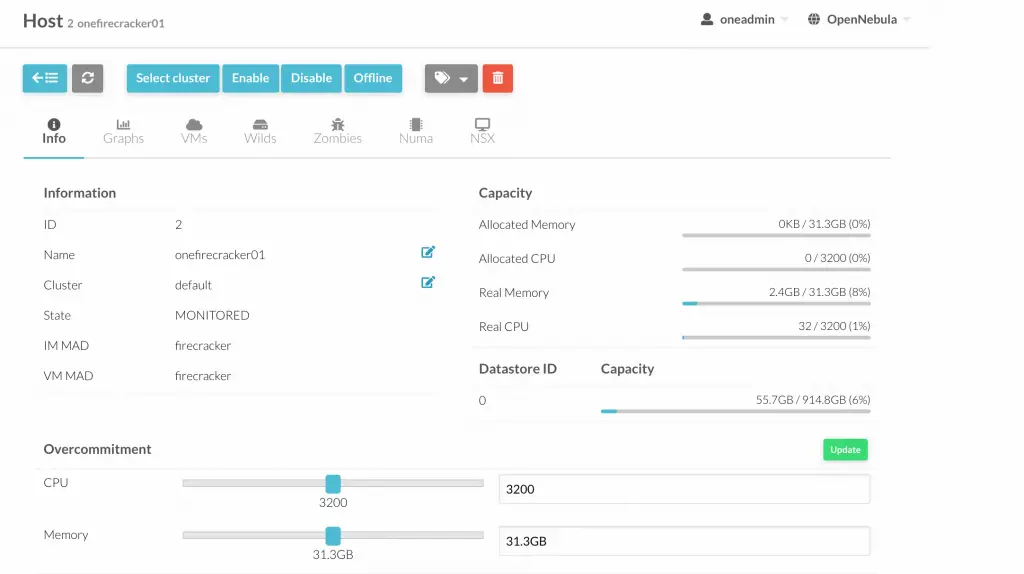
Wait for the host to be added then confirm its status
Step 7: Configure Firecracker Node Networking
Next step is configuration of Networking on the node. Refer to below two guides:
Step 8: Deploy Nginx test Application
Once OpenNebula’s front-end and the Firecracker hypervisor are installed, we can proceed to deploy one simple application.
Navigate to “Storage” > “MarketPlaces” > “DockerHub“
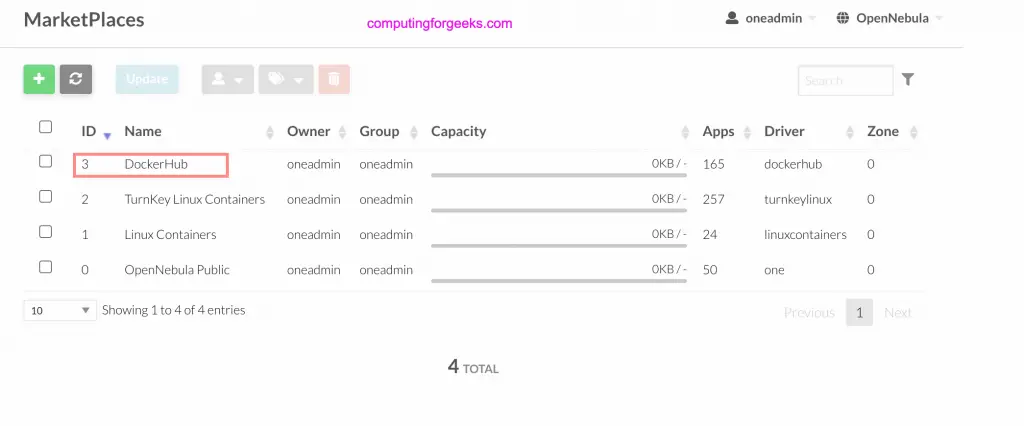
Click on the “Apps” tab and search and select “Nginx“

Download it into the default datastore.

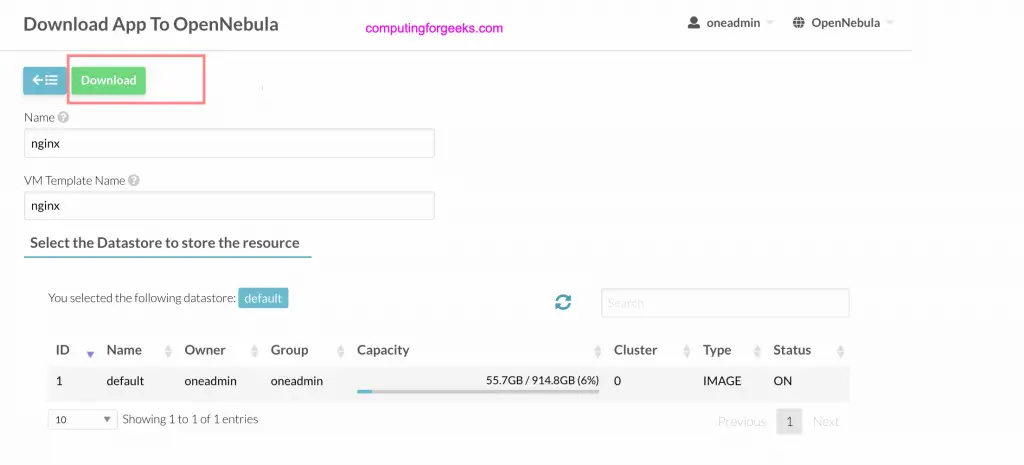
When Nginx is imported from Docker Hub, a VM template is also created – “Templates” > “VMs” > “nginx”

You’ll have to update the template by clicking “Update“:

In the advanced options select VNet network and IP address.
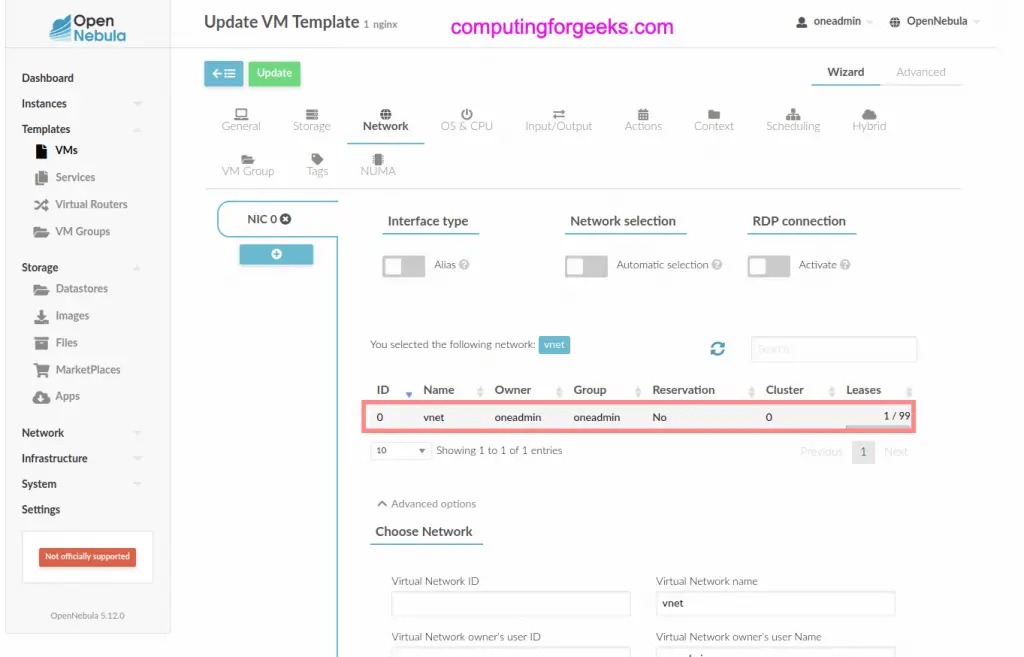
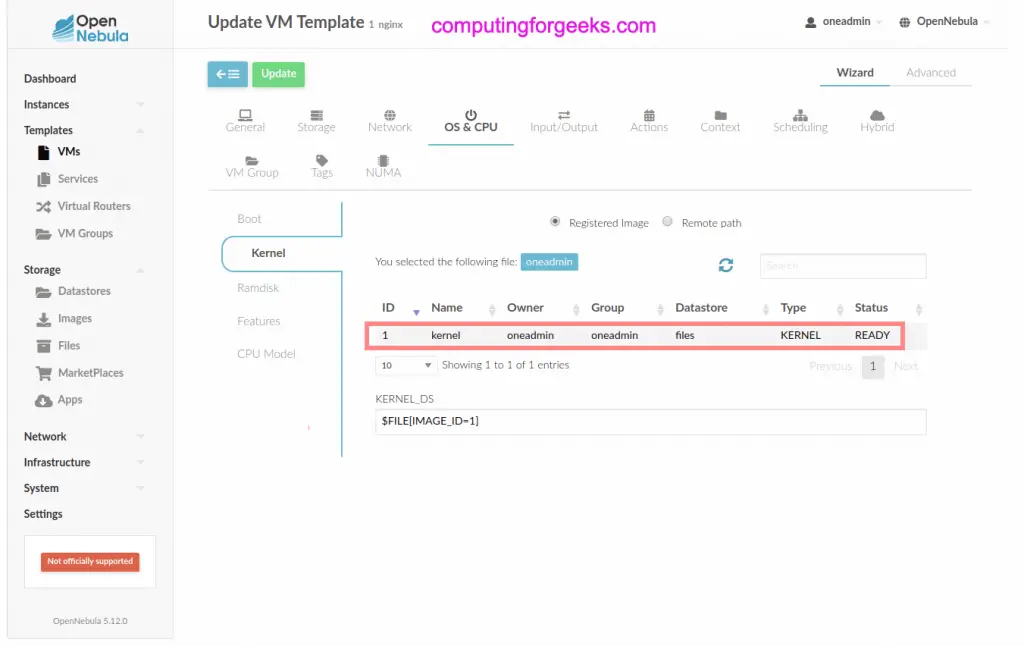
In “OS & CPU” select the kernel image imported.
Add the container start script.

Update the Custom Vars by setting the root password.

Once the VM template is updated you can instantiate it to create a microVM.

You can check the instance console to confirm it is running:

In order to access the VM outside the host you can set the following iptables rules.
sudo iptables -A PREROUTING -t nat -i enp4s0 -p tcp --dport 80 -j DNAT --to 172.16.100.30:80
sudo iptables -A FORWARD -p tcp -d 172.16.100.30 --dport 80 -j ACCEPT
Where:
- 172.16.100.30 is the IP address of the MicroVM
- enp4s0 is the physical network interface
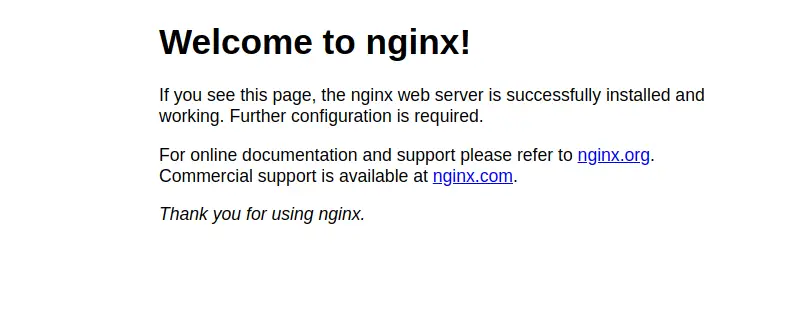
Open your browser to access the Nginx application by using the public IP of the host where the container is running:
More guides on OpenNebula:
- OpenNebula LXD Node Installation on Debian
- Creating Ubuntu & Debian Virtual Machines on OpenNebula
- Create CentOS|Ubuntu|Debian VM Templates on OpenNebula
Leave a Reply
You must be logged in to post a comment.