Learn how to – Configure Slave BIND DNS Server on Ubuntu 22.04|20.04.
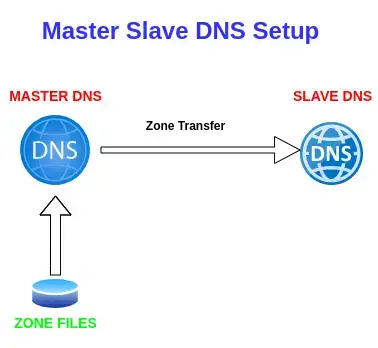
In the previous post we covered how to setup a primary DNS server using BIND9. We shall be exploring how to setup a secondary DNS server. A slave DNS server gets a copy of data from the primary DNS using the zone transfer method. This method keeps the zone data in a cache for a particular time and uses it to serve DNS queries.

In our setup, we have a primary DNS server whose IP is 172.16.10.2 and domain name is ns1.learnhowto.local.
We are setting up a secondary server with 172.16.10.10 and ns2.learnhowto.local.
Step 1 – Configuration on the Bind Master DNS
For the Master-Slave setup, we need to configure the master DNS server and enable zone transfer to the secondary Name Server.
We will edit the /etc/named.conf.local file on the primary server (ns1.learnhowto.local) and add the allow-transfer and also-notify parameters.
sudo vim /etc/bind/named.conf.localThis will be done for both the forward and reverse entries.
##Forward zone
zone "learnhowto.local" IN { // Domain name

      type master; // Primary DNS

     file "/etc/bind/forward.learnhowto.local.db"; // Forward lookup file

     allow-update { none; }; // Since this is the primary DNS, it should be none.
     allow-transfer  { 172.16.10.10; }; //Allow Transfer of zone from the master server

     also-notify { 172.16.10.10; }; //Notify slave for zone changes

};

##Reverse zone
zone "10.16.172.in-addr.arpa" IN { //Reverse lookup name, should match your network in reverse order

     type master; // Primary DNS

     file "/etc/bind/reverse.learnhowto.local.db"; //Reverse lookup file

     allow-update { none; }; //Since this is the primary DNS, it should be none.

     allow-transfer  { 172.16.10.10; }; //Allow Transfer of zone from the master server

     also-notify { 172.16.10.10; }; //Notify slave for zone changes

};
The allow-transfer parameter allows transfer of zone files from the master to the slave DNS while the also-notify helps notify the slave whenever there is an update on the zone files from the master.
We have to restart DNS service on ns1.learnhowto.local:
sudo systemctl restart bind9Step 2 – Configure Slave DNS
Install the necessary packages:
sudo apt-get install -y bind9 bind9utils bind9-doc dnsutilsEdit the file at /etc/bind/named.conf.local and add both the forward and reverse zone parameters:
sudo vi /etc/bind/named.conf.local
###Forward Zone

zone "learnhowto.local" IN { //Domain name

     type slave; //Secondary Slave DNS

     file "/var/cache/bind/forward.learnhowto.local.db"; //Forward Zone Cache file

     masters { 172.16.10.2; }; //Master Server IP

};

####Reverse zone

zone "10.16.172.in-addr.arpa" IN { //Reverse lookup name. Should match your network in reverse order

     type slave; // Secondary/Slave DNS

     file "/var/cache/bind/reverse.learnhowto.local.db"; //Reverse Zone Cache file

     masters { 172.16.10.2; }; //Master Server IP

};
Restart DNS service:
sudo systemctl restart bind9Step 3 – Test Slave DNS Setup
To test if the zone transfer was successful and DNS is working on the slave server, we’ll need to configure a client host and use the slave as its DNS server.
In Ubuntu:
$ sudo vim /etc/resolv.conf
nameserver 172.16.10.10
We can then use the dig command to verify the DNS.
root@ubuntu:~# dig www.learnhowto.local

; <<>> DiG 9.16.1-Ubuntu <<>> www.learnhowto.local
;; global options: +cmd
;; Got answer:
;; WARNING: .local is reserved for Multicast DNS
;; You are currently testing what happens when an mDNS query is leaked to DNS
;; ->>HEADER<<- opcode: QUERY, status: NOERROR, id: 24401
;; flags: qr aa rd ra; QUERY: 1, ANSWER: 1, AUTHORITY: 0, ADDITIONAL: 1

;; OPT PSEUDOSECTION:
; EDNS: version: 0, flags:; udp: 4096
; COOKIE: b1e287dd1d118ad6010000005f8c88233ef562a7063e7a15 (good)
;; QUESTION SECTION:
;www.learnhowto.local.	IN	A

;; ANSWER SECTION:
www.learnhowto.local. 604800 IN	A	172.16.10.3

;; Query time: 0 msec
;; SERVER: 172.16.10.10#53(172.16.10.10)
;; WHEN: Sun Oct 18 18:23:31 UTC 2020
;; MSG SIZE  rcvd: 100
You can use the dig domain-name @<nameserver> if you wish to explicitly direct the query to the slave DNS.
dig www.learnhowto.local @172.16.10.10The result shows that you the slave DNS is able to handle queries. This is an implication that the Master-slave DNS setup is working as desired.
Conclusion
You have successfully setup a slave DNS server on Ubuntu 22.04|20.04 using BIND9. Please share your feedback in the comments section.
Other guides:
- Install PowerDNS on CentOS 8 with MariaDB & PowerDNS-Admin
- How To add DNS Forward Lookup Zone in Windows Server
- How To Monitor BIND DNS server with Prometheus and Grafana
Leave a Reply
You must be logged in to post a comment.